Can Retaining Walls Be Repaired?Retaining walls are crucial structural elements in our surroundings, often implemented in landscapes for both aesthetic appeal and practical function. These walls help manage water runoff, convert sloped terrain into usable space, and prevent soil erosion. Despite their strength and durability, they can still succumb to damage over time. The good news is: Yes, retaining walls can indeed be repaired. But understanding when and how to do so requires a nuanced understanding of these structures. Signs That Your Retaining Wall Needs RepairBefore delving into repair strategies, it's important to recognize when a retaining wall is in need of attention. Here are a few warning signs: Tilting or Leaning: One of the most obvious signs of a failing retaining wall is a noticeable tilt or lean. This may indicate issues with the soil or foundation. Cracks and Fractures: Any significant crack or fracture can compromise the wall's integrity, leading to possible structural failure if left unchecked. Bulging or Bowed Walls: This sign is usually more serious as it can mean that the pressure from the soil behind the wall is too great and the wall may be close to collapsing. Separation of Retaining Wall from Adjoining Walls: If the retaining wall starts separating from adjoining walls, this could indicate a serious problem that needs immediate attention. Understanding the Cause of DamageBefore we look at signs of damage, it is essential to understand what might cause these issues in the first place. Retaining walls can fail for various reasons, often related to pressure, drainage issues, or the quality of construction. Pressure: Retaining walls are built to withstand lateral pressure from the soil. However, excessive pressure can lead to wall deformation or even collapse. This pressure can increase due to factors like additional load on the retained soil or increased soil moisture. Poor Drainage: Adequate drainage is a must for any retaining wall as water accumulation in the soil behind the wall can significantly increase the pressure on the wall. A poorly designed or clogged drainage system can result in soil saturation, increasing the load the wall has to bear. Quality of Construction: Like any structure, the quality of materials used and the construction technique impact the lifespan and durability of a retaining wall. Poor quality materials or improper construction can lead to early deterioration or structural failure. Early Detection: Knowing When to RepairTo reiterate, recognizing the signs of a failing retaining wall is the first step towards remedying the situation. In addition to the previously mentioned signs (tilting, cracks, bulging, and separation), also watch out for: Water Seepage: If you see water seeping through the face of the wall, it's a sign that the drainage system may not be functioning properly. Erosion: Erosion at the base of the wall could signal a serious issue, as it can undermine the wall's stability. Repairing Retaining WallsThe process of repairing retaining walls depends heavily on the damage level and wall type (wooden, concrete, stone, or block). However, these are some general methods: Minor Cracks and LeaksMinor cracks and leaks are the most common issues with retaining walls. The repair usually involves patching the crack with an appropriate material. For concrete walls, a cement-based mixture is typically used. The area should be cleaned thoroughly before applying the patch to ensure maximum adhesion. Structural RepairsIf the wall is leaning, bulging, or has significant cracks, structural repairs may be necessary. These repairs can range from installing anchors and braces to stabilize the wall, to partial or even complete wall replacement. In some cases, soil nailing is used. This technique involves drilling holes into the soil and inserting steel bars, which are then grouted in place. The result is improved soil stability, reducing the pressure on the wall. Another solution for serious structural issues is the installation of tiebacks. These are steel rods drilled into the soil behind the wall, providing additional support. Complete Wall ReplacementIn cases where the retaining wall is severely damaged or poorly constructed, complete replacement might be the only viable option. The existing wall is removed and a new one is built, this time with improved materials and techniques to ensure longevity and durability. Preventive Measures: A Stitch in Time Saves NinePrevention, as the old adage goes, is better than cure. To minimize the need for repairs, here are some preventive measures: Regular Inspection: Conduct regular inspections of your retaining wall, especially after severe weather or noticeable landscape changes. Early detection can make the repair process simpler and less costly. Proper Drainage: Ensure your retaining wall has an efficient drainage system to avoid water buildup. Keep the drainage outlets clear of debris. Professional Construction: If you're planning to build a retaining wall, hire professionals. They will consider all the necessary factors like the type of soil, load, slope, and drainage requirements, ensuring a structurally sound wall. Ecological Considerations for Retaining Wall RepairIn today's world, it's also important to consider the environmental impact of our infrastructure choices. When repairing or replacing a retaining wall, consider using materials and methods that are ecologically friendly. For instance, you could use locally sourced materials, which have a lower carbon footprint due to reduced transportation requirements. Or, consider a green or living wall. These incorporate plant life into the wall design, helping to control erosion while also promoting biodiversity. Innovative Repair TechniquesAs we move further into the 21st century, new techniques and materials are constantly being developed to deal with infrastructure repair. For retaining walls, techniques such as helical tieback anchors are becoming increasingly common. These screw-like devices are drilled into the ground behind the wall, providing additional lateral support without the need for major excavation work. Materials too, have seen advances. For example, cellular concrete (also known as aerated concrete) is a lightweight, versatile material that is becoming popular in retaining wall construction. It provides excellent drainage, reduces pressure on the wall, and is easy to work with when repairing or replacing sections of a retaining wall. When to Seek Professional HelpWhile some minor issues can be addressed by homeowners themselves, it's usually recommended to seek professional help for retaining wall repairs. Professionals have the expertise to properly assess the situation and implement the most effective solution. DIY repairs, especially on structural issues, may lead to more harm than good in the absence of necessary knowledge and skills. Concluding ThoughtsSo, can retaining walls be repaired? Absolutely. It's a process that requires a keen eye for early detection, an understanding of the repair strategies available, and a preventative mindset. By being proactive in the maintenance and care of these crucial structures, homeowners can extend the life and function of their retaining walls. And when repairs are necessary, consulting with a professional can ensure that the job is done right, providing peace of mind along with a restored wall.
Retaining walls are more than just an aesthetic feature, they are an integral part of our landscape's infrastructure. With proper care and maintenance, they will continue to enhance our properties, supporting the land and providing safety for years to come.
0 Comments
Do Retaining Walls Increase Home Value?It is no secret that homeowners continually seek opportunities to improve their properties and potentially increase their home's market value. This endeavor often leads to various renovations and updates, ranging from updated kitchens and bathrooms to professionally landscaped gardens. However, one potentially valuable yet often overlooked area of improvement lies in the addition of retaining walls. What Are Retaining Walls?Retaining walls are primarily functional structures designed to restrain soil to unnatural slopes. They are used to bind soils between two different elevations, often in areas of the landscape where soil needs to be withheld from erosion. Retaining walls can be built from various materials such as concrete, stone, brick, and wood. However, beyond their functional purpose, retaining walls can also significantly enhance the aesthetic appeal of a property and provide additional usable space. Types of Retaining Walls and Their AdvantagesThere are several types of retaining walls, each with its own benefits and aesthetics. 1. Gravity Retaining Walls Gravity retaining walls use their weight to resist the pressure from the soil. They're typically made of stone, concrete, or other heavy material. These walls often give off a sense of solidity and permanence, adding to the overall aesthetics of your landscape. They work best for smaller embankments and can add a classic touch to your property. 2. Cantilever Retaining Walls Cantilever retaining walls use a retaining wall affixed to a slab foundation that extends into the soil. This type of retaining wall is excellent for taller slopes and can resist a higher amount of soil pressure compared to gravity walls. When designed and constructed well, they offer a sleek and minimalistic aesthetic appeal to your landscape. 3. Sheet Piling Walls Sheet piling walls, typically made of steel, vinyl, or wood planks, are driven into the ground, suitable for tight spaces and softer soils. While not always as aesthetically pleasing as other types, they can be highly functional and effective for erosion control. 4. Anchored Retaining Walls Anchored retaining walls can be combined with other types and are strengthened by cables (anchors) driven into the soil or rock behind the wall. They offer added strength and support, making them ideal for retaining larger amounts of soil. Retaining Walls and Property ValueSo, the question arises: Do retaining walls increase home value? The straightforward answer is yes, retaining walls can indeed boost the value of your home. Here's how: 1. Improved Curb Appeal Curb appeal can significantly impact a home's value. It is often the first impression potential buyers get of your property. Retaining walls, when properly integrated into the landscape, can significantly enhance a property's overall aesthetic appeal. A well-designed and built retaining wall can turn a previously unutilized or problematic slope into a beautiful, visually appealing landscape feature. 2. Erosion Control Erosion control is particularly crucial for homes built on slopes or in areas prone to flooding. A well-built retaining wall will control erosion by holding back soil, protecting your property's foundation, and reducing the likelihood of destructive landslides. This added layer of security can be a strong selling point, thus enhancing your property's value. 3. Creation of Usable Space Sloping properties often have unusable or under-utilized outdoor space. Retaining walls allow homeowners to level out such areas and create valuable additional space for gardening, a patio, or even an outdoor kitchen. Potential buyers often see this additional usable space as a considerable advantage, which directly impacts the perceived and real value of the home. 4. Low Maintenance Retaining walls, especially those made from concrete, brick, or stone, are typically low maintenance, which can be a significant selling point. This factor is an essential consideration for potential buyers who don't want to invest in a home with high ongoing maintenance costs. The Cost and Return on Investment of Retaining WallsThe cost of a retaining wall can vary dramatically based on its size, materials used, complexity of installation, and the specific conditions of your property. On average, homeowners may spend anywhere from $3,000 to $8,000 on a retaining wall, though this can be higher for larger, more complex projects. When it comes to return on investment, a well-executed retaining wall can offer a substantial return. According to the National Association of Realtors, landscape improvements such as retaining walls can provide a return on investment of up to 15%. That means for a home valued at $500,000, a well-placed and aesthetically pleasing retaining wall could potentially add $75,000 to the selling price. Additionally, retaining walls can speed up the sale of your home. Properties with well-maintained landscapes tend to sell faster than those without, and retaining walls are often viewed as a sign of a well-cared-for property. The Value of Professional Design and ConstructionA professionally designed and constructed retaining wall not only ensures the wall's effectiveness and longevity but also adds to the potential value increase of your property. A professional will consider the soil type, slope gradient, drainage needs, and local climate in the design of the retaining wall, ensuring that it will not only serve its purpose but also stand the test of time. Moreover, a professional designer can help select the best materials and style for your retaining wall to enhance your property's aesthetics and match your home's overall design. Investing in professional construction will also mitigate potential risks associated with poorly constructed retaining walls. These could include problems like water pooling, wall collapse, and soil instability, which could potentially decrease property value and pose safety hazards. Environmental Benefits of Retaining WallsBeyond aesthetic appeal and functionality, retaining walls can also play a significant role in environmental conservation, further adding to the value of your home. 1. Conservation of Soil By holding back soil, retaining walls prevent erosion, which can be particularly problematic in areas with heavy rains or steep slopes. This not only helps preserve your property but also contributes to the overall health of your local ecosystem by reducing sediment runoff into local waterways. 2. Preservation of Nature Well-planned retaining walls can help preserve existing trees and vegetation on your property, maintaining the natural environment while still providing necessary stabilization. Trees can also add to the overall value of your property, enhancing aesthetics and providing environmental benefits like shade and carbon sequestration. Considerations When Installing a Retaining WallWhile retaining walls can indeed add value to your home, keep in mind that their benefits are maximized when they are professionally designed and installed. Poorly constructed walls can potentially become a liability, causing water drainage issues, collapsing under pressure, or detracting from the visual appeal of the property. In addition, the choice of material used can also affect the value added by the retaining wall. Natural stone and brick tend to be more aesthetically pleasing than concrete blocks and may offer a higher return on investment. Invest in Retaining Walls for Your PropertyIn conclusion, adding a retaining wall to your property is not only a practical consideration but also a strategic investment move. Retaining walls not only add functional value by preventing soil erosion and creating usable land but also boost aesthetic appeal, contributing to your home's overall desirability to potential buyers.
When considering a retaining wall, it's important to consult with a professional to understand the best type for your needs and potential returns based on your property's specifics. Understanding How Retaining Walls WorkThere's a subtle art and science to the landscapes we often take for granted. Not all features of a well-structured landscape are purely for aesthetics. Some, like the humble retaining wall, bear significant functional importance. Retaining walls may appear to be simple structures, but they perform a crucial job - keeping soil in place, preventing erosion, and even protecting your property from potential damage. Let's take a closer look at how these unsung heroes of our landscapes work. Understanding Retaining WallsA retaining wall is a sturdy structure designed to restrain soil to unnatural slopes. They are used to bind soils between two different elevations often where the landscape needs to be shaped severely and engineered for more specific purposes like hillside farming or roadway overpasses. Retaining walls come in various forms, including gravity walls, cantilever walls, sheet pile walls, and anchored walls. Each has its unique design and construction process but essentially operates on the same principle – to hold back soil and prevent it from shifting or eroding. The Science Behind Retaining WallsAt the core, retaining walls work on principles of physics and geotechnical engineering. The main force acting against a retaining wall is the lateral earth pressure, which is the force exerted by the soil being retained. This pressure is a result of the weight of the soil, water within the soil, and any applied loads above the soil, such as a car or building. In essence, a retaining wall has to be strong enough to withstand and balance this lateral earth pressure. The wall’s stability comes from its weight, its embedded depth into the ground, and the way it's engineered. Types of Retaining WallsGravity Walls: As the name suggests, these walls rely on their weight to keep the soil in place. They are thick and heavy, leaning back against the soil, and their stability comes from their weight and the friction against the ground surface they are built upon. Cantilever Walls: These walls consist of a relatively thin stem and a base slab consisting of two parts: the heel (the part under the backfill) and the toe (the other part). The weight of the backfill soil on the heel helps to keep the wall stable. Sheet Pile Walls: Typically used in soft soil and tight spaces, these walls are made out of steel, vinyl, or wood planks driven into the ground. Their stability comes from the resistance of the soil above the embedded part of the wall. Anchored Walls: Sometimes, additional strength is needed to hold the soil in place. This is where anchored walls come in. They are supported by anchors driven into the ground behind the wall, which is then expanded by mechanical means or by injecting pressurized concrete (a process called grouting). The Importance of Proper DrainageOne key feature in the design of successful retaining walls is effective drainage. Without proper drainage, water accumulating in the soil behind the wall can significantly increase the lateral earth pressure, which could eventually lead to wall failure. Drainage materials and systems help reduce this hydrostatic pressure and increase the overall stability of the retaining wall. Beyond Retaining Walls: Implications and ApplicationsWhile retaining walls may seem to be a static part of the landscape, they can be versatile tools when correctly employed. Their various uses extend beyond their primary role of soil retention and slope stabilization. Aesthetic Impact: With modern advancements, retaining walls are no longer just concrete or stone structures. Now, they can also be beautiful architectural features that enhance the visual appeal of any outdoor space. They can be designed using various materials such as natural stone, brick, and even wood, which can add a rustic appeal. Incorporating interesting design elements, such as curves and tiered levels, can also add to their visual impact. Creating Outdoor Living Spaces: Retaining walls can be used to define and structure outdoor living spaces. They can carve out areas for patios, play areas, or gardens, adding a new dimension to your yard. The walls can also be used as natural seating areas when built at the right height. Addressing Drainage Issues: When combined with proper drainage solutions, retaining walls can help solve issues related to water pooling or runoff. The wall system can direct water away from your property, protecting your home and landscape from potential water damage. Increasing Property Value: A well-constructed retaining wall can add value to your property. They create more usable land, control erosion, manage water runoff, and enhance the overall aesthetics of your property. All these factors can contribute to increased property value, making retaining walls a worthwhile investment for homeowners. Things to Consider Before You BuildBefore undertaking the construction of a retaining wall, it's important to consider several factors. Soil Analysis: Understanding the type and quality of your soil is crucial. Some soils may not have the strength to support a retaining wall, while others may require additional reinforcement. Professional Consultation: Due to the complex nature of the forces at work, professional advice or consultation is often recommended for walls above a certain height (usually around 3-4 feet). Professionals can analyze the site conditions and provide expert advice on the type of wall that would best suit your needs. Local Regulations: Checking local building codes and regulations is also important. Some areas may require a permit to build a retaining wall, especially if it's above a certain height or if it's near property lines. Environmental Impact: Finally, consider the environmental impact of your construction. Properly constructed retaining walls can help prevent erosion and sediment runoff, which can harm local waterways. Retaining walls are often underappreciated elements of our built environment, silently performing their vital role. Through a blend of engineering, design, and environmental consideration, these structures provide a wide range of solutions to our everyday landscaping challenges. As we come to better understand the functions and benefits of retaining walls, we can appreciate the value they add to our landscapes and our lives. Retaining Walls are Shaping Our LandscapeRetaining walls are powerful allies in shaping and safeguarding our landscapes. From simple garden boundaries to mammoth hillside supports, they offer reliable solutions to challenging land topography. Understanding how retaining walls work is a testament to how much thought, design, and science go into creating landscapes that are not only beautiful but also safe and functional.
Retaining walls are more than just decorative features for your yard or garden. They're a necessity for any landscape prone to soil erosion or with notable changes in elevation. Understanding their function is vital to maintaining the safety and integrity of your property, as well as maximizing the usability of your outdoor space. Are Retaining Walls Covered by Homeowners Insurance?As a homeowner, you are aware that your insurance policy is a critical line of defense against unforeseen damages. From fire and theft to natural disasters, your homeowners insurance provides the necessary coverage to protect you financially. But when it comes to certain structural aspects of your property, like retaining walls, the extent of coverage can be a bit murky. So, let's dive into this question: Are retaining walls covered by homeowners insurance? What Are Retaining Walls?Before we go any further, it's essential to understand what retaining walls are. These are robust structures that hold back soil and prevent it from eroding or sliding downhill. They may also manage water runoff and help reduce the impact of flooding. Retaining walls can be built from a variety of materials including concrete, brick, stone, and wood. They often add aesthetic appeal to landscapes while also serving important functional purposes. Homeowners Insurance BasicsHomeowners insurance typically covers your dwelling (the physical structure of your home), your personal property (furniture, electronics, clothes, etc.), liability coverage (should someone sue you for injury or property damage), and additional living expenses (if you need to live somewhere else while your home is being repaired). Most policies operate on a named peril basis, meaning they only cover damage caused by perils specifically listed in the policy. The most common ones include fire, windstorms, hail, lightning, theft, and vandalism, to name a few. Any damage caused by perils not named in the policy is generally not covered. Coverage for Retaining WallsWhen it comes to retaining walls, it's important to know that these are generally considered separate structures or "other structures" under your homeowners insurance policy. The "other structures" portion of your policy may cover structures like fences, sheds, detached garages, and yes, retaining walls. However, coverage for retaining walls is not automatic and it often depends on what caused the damage. For instance, if a covered peril like a fire or a lightning strike damages your retaining wall, your homeowners insurance policy is likely to cover the repair or replacement costs. But there are also instances where damage to retaining walls may not be covered. Standard homeowners insurance policies often do not cover damages caused by earth movement such as landslides, earthquakes, and sinkholes. So, if your retaining wall collapses due to soil erosion or ground shifting, you may find that your policy doesn't cover it. Also, damage due to negligence, poor construction, or lack of maintenance may not be covered. If the wall was poorly constructed or if it's older and hasn't been properly maintained, an insurance company may deem any resulting damage as preventable and hence, not covered. Extending the Coverage of Homeowners InsuranceHomeowners insurance is a cornerstone in safeguarding you from significant financial losses due to a myriad of unforeseen damages that your home might incur. Standard policies typically cover your dwelling (the structure of your house), personal property (belongings within the home), liability coverage (protects you from lawsuits for injury or property damage), and additional living expenses (covering costs if you're unable to live in your home while it's being repaired). It's crucial to note that most insurance policies work on a named peril basis. This means that they cover damage resulting from specific causes, often including fire, windstorms, hail, lightning, theft, and vandalism among others. However, they generally don't cover damage resulting from perils not listed in the policy. Supplementing Your CoverageIf you are worried about risks that your standard homeowners insurance policy does not cover, it might be prudent to consider additional coverage or endorsements. For instance, separate policies for flood insurance or earthquake insurance can shield you from damages associated with these specific perils. Regular maintenance and proper construction of retaining wall also contribute to solidifying your case for a claim, as insurers might deny claims tied to poor upkeep. Enhancing Your Retaining Wall ProtectionAn important step in protecting your property is regular consultation with your insurance agent and regular inspections by a qualified professional. An insurance agent can guide you through the specifics of your policy and provide recommendations for additional coverage if needed. Similarly, a structural engineer or landscaping professional can evaluate the health of your retaining wall and suggest preventative measures to enhance its longevity. When it comes to maximizing the longevity of your retaining wall and ensuring that it qualifies for coverage under your homeowners insurance, a proactive approach is key. Regular inspections are a must to catch early signs of wear and tear. Also, addressing any drainage issues immediately and ensuring proper construction and reinforcement of the wall are paramount. Also, if your retaining wall is aging, it might be a good idea to have it professionally assessed. A necessary repair or rebuild conducted promptly could save you from larger problems down the line. Plus, insurers look favorably upon homeowners who are proactive about maintenance as this reduces the risk of damage. Risks Vary by GeographyThe risks associated with retaining walls can vary greatly depending on where you live. In areas prone to heavy rainfall, flooding, or seismic activity, retaining walls can be particularly vulnerable. If you live in one of these high-risk areas, it's essential to consider whether your homeowners insurance provides adequate coverage. You may need to explore additional policies or endorsements to better protect your property. Communicating with Your Insurance ProviderDon't hesitate to maintain an open line of communication with your insurance provider. If you're planning to add a retaining wall, notify them and ask how this change could affect your coverage. If your retaining wall is damaged, report it as soon as possible and provide thorough documentation, including photographs and professional evaluations. Wrapping UpIn conclusion, retaining walls and homeowners insurance is a complex topic with no one-size-fits-all answer. Coverage depends on a variety of factors, from the specifics of your policy to the cause of the damage and your geographical location. Understanding these factors and taking a proactive role in maintaining your retaining wall will put you in a better position to navigate the intricacies of your insurance coverage.
Always remember that insurance policies are meant to provide you with peace of mind, protecting you against unforeseen damages. It is crucial that this coverage extends to all aspects of your property, including features like retaining walls. Being informed and proactive is the best way to ensure that you have the coverage you need when you need it. The Ultimate Comparison: Which Concrete Resurfacer is Best For You?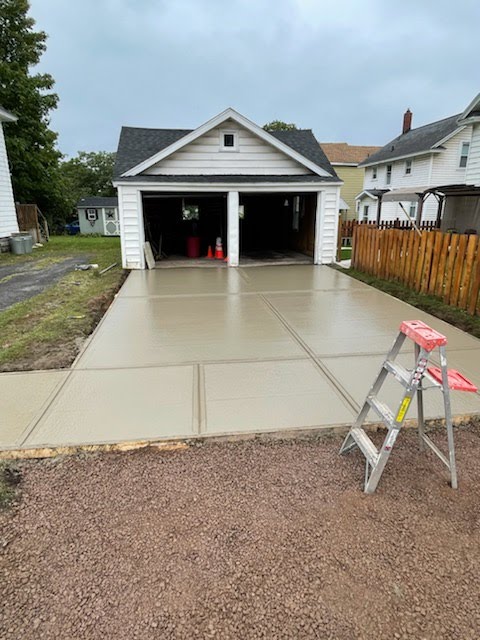 Concrete surfaces are known for their durability and longevity. However, over time, even the toughest concrete can show signs of wear and tear. Cracks, spalling, and discoloration can occur, diminishing the appearance and functionality of your concrete surfaces. Fortunately, concrete resurfacers offer an effective solution to revitalize and restore your worn-out concrete. But with various options available on the market, it can be challenging to determine which concrete resurfacer is the best choice for your specific needs. In this article, we'll explore and compare some of the leading concrete resurfacers to help you make an informed decision. Quikrete Concrete ResurfacerQuikrete Concrete Resurfacer is a popular choice among DIY enthusiasts and professionals alike. It is a polymer-modified product designed to repair and resurface spalled, damaged, or worn concrete surfaces. This resurfacer creates a smooth, durable, and visually appealing finish. Its self-bonding properties ensure excellent adhesion to existing concrete, making it a reliable option for various applications. Quikrete Concrete Resurfacer is relatively easy to apply and offers a cost-effective solution for small to medium-sized projects. Sakrete Flo-Coat Concrete ResurfacerSakrete Flo-Coat Concrete Resurfacer is another reputable product known for its high performance. This polymer-modified resurfacer is designed to repair and renew old, damaged, or pitted concrete surfaces. It provides a strong bond to the existing substrate, creating a durable and long-lasting finish. Sakrete Flo-Coat is self-leveling, which means it spreads evenly over the surface, minimizing the effort required for a smooth application. It also offers excellent coverage, making it suitable for both residential and commercial projects. Ardex CD Concrete DressingArdex CD Concrete Dressing is a top-quality concrete resurfacing product that offers exceptional performance and versatility. It is specially formulated to resurface and restore deteriorated concrete surfaces, providing a fresh and durable finish. Ardex CD Concrete Dressing has a rapid-setting time, allowing for quick installations, minimizing downtime. It can be used to create a smooth, level surface or add texture for a more decorative look. This resurfacer is ideal for high-traffic areas, such as driveways, sidewalks, and parking lots. Rust-Oleum EpoxyShield Concrete ResurfacerIf you're looking for a more robust and heavy-duty concrete resurfacer, Rust-Oleum EpoxyShield is worth considering. This epoxy-based resurfacer provides exceptional strength, durability, and chemical resistance. It is designed to withstand heavy foot and vehicle traffic, making it suitable for industrial and commercial applications. Rust-Oleum EpoxyShield Concrete Resurfacer is available in various colors, allowing you to customize the appearance of your concrete surface while providing a protective layer against stains and spills. Selecting the Right Concrete ResurfacerWhen selecting a concrete resurfacer, it's essential to consider factors such as the climate and weather conditions in your region. Some resurfacers may be better suited for hot and dry climates, while others may perform well in colder or humid environments. Understanding the limitations and recommended application conditions of each product will help ensure optimal results and longevity. Furthermore, it's worth noting that concrete resurfacers can offer different finishes and textures. Some products provide a smooth and sleek surface, while others offer options for adding texture or patterns, enhancing the visual appeal of your concrete. Consider the desired aesthetic outcome and choose a resurfacer that aligns with your vision. Budget is another crucial aspect to consider. Concrete resurfacers can vary significantly in price, depending on the brand, quality, and coverage. While it's important to stay within your budget, it's also essential to prioritize the quality and durability of the product. Investing in a higher-quality resurfacer may result in better long-term performance and overall satisfaction. Lastly, don't hesitate to seek professional advice if you're unsure about which concrete resurfacer to choose. Contractors, builders, or experienced individuals in the construction industry can provide valuable insights and recommendations based on their expertise and hands-on experience. The Right ChoiceIn conclusion, determining the best concrete resurfacer depends on several factors, including the specific requirements of your project, the condition of the existing concrete, climate considerations, desired finishes, and your budget. By carefully evaluating these factors and researching the available options, you can select a concrete resurfacer that meets your needs, enhances the appearance of your concrete surfaces, and provides long-lasting durability.
Remember to follow proper application techniques and maintenance guidelines to ensure optimal results and enjoy the benefits of a rejuvenated concrete surface. How Much Does it Cost to Remove a Concrete Pool?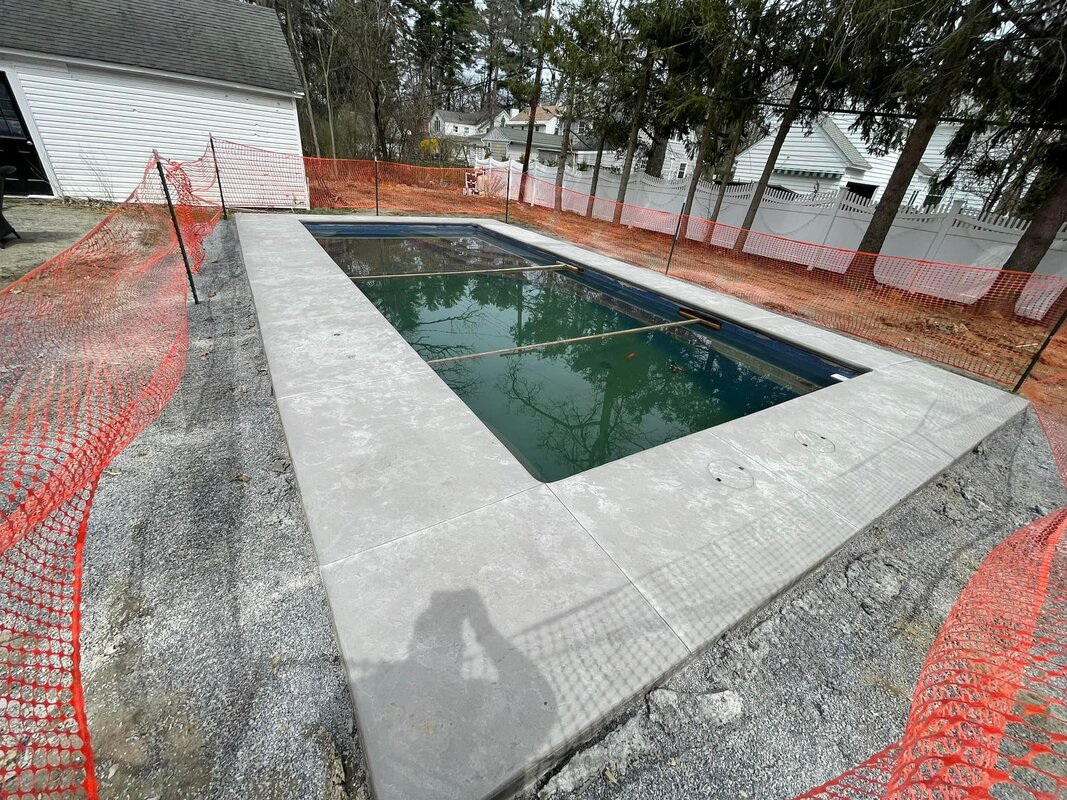 Swimming pools are undoubtedly a luxurious addition to any property, providing countless hours of enjoyment and relaxation. However, circumstances may arise when you find yourself contemplating the removal of a concrete pool. Whether it's due to the need for more yard space, pool maintenance burdens, or an outdated design, the cost of removing a concrete pool is a crucial factor to consider. In this article, we will delve into the various aspects that impact the cost of removing a concrete pool, providing you with a comprehensive guide to help you make an informed decision. Factors That Affect the CostsSize and Depth of the PoolThe size and depth of the concrete pool play a significant role in determining the removal cost. Generally, larger pools with greater depths require more labor, equipment, and time to demolish and remove. The larger the pool, the higher the cost. Access to the PoolThe accessibility of the pool area is another crucial factor affecting the cost. If your pool is easily accessible, it will be easier for contractors and equipment to enter and exit the site. However, if the pool is located in a confined space or has limited access, additional efforts may be required, which can increase the overall cost. Demolition MethodSeveral methods can be employed to remove a concrete pool, each with its associated costs. The two primary techniques are partial removal (also known as abandonment) and complete removal. Partial Removal: This method involves breaking up the concrete and filling the pool cavity with gravel or soil. It is a more affordable option, as it eliminates the need to haul away the concrete debris. However, it may have limitations if you plan to build on the site in the future. Complete Removal: Complete removal involves breaking up and hauling away the concrete, including the pool shell and associated materials. While this method is more expensive, it provides you with a clean slate for future landscaping or construction projects. Permits and RegulationsBefore removing a concrete pool, it's essential to consider any necessary permits or regulations in your local area. Permit costs vary depending on your location and can significantly impact the overall removal cost. It's crucial to research and factor in these additional expenses when budgeting for the pool removal. Additional FactorsSeveral other factors may influence the cost of removing a concrete pool: Location: The cost of labor and disposal fees can vary depending on your geographical location. Utilities: Disconnecting and capping off utilities such as water, gas, and electricity lines associated with the pool may incur additional costs. Debris Removal: The cost of hauling away the concrete debris from the site may vary based on the volume and distance to the disposal facility. Restoration: After the pool removal, you might want to consider restoring the area with topsoil, grass, or landscaping. These restoration costs should be factored into the overall budget. Hiring a Professional ContractorWhen it comes to removing a concrete pool, it is highly recommended to hire a professional contractor with expertise in pool demolition and removal. While the cost of hiring a contractor is an additional expense, it is well worth it considering the complexity of the task and the potential risks involved. An experienced contractor will ensure the job is done efficiently, safely, and in compliance with local regulations. Obtaining Quotes and Comparing CostsTo get an accurate estimate of the pool removal cost, it is advisable to obtain quotes from multiple contractors. Requesting detailed proposals will allow you to compare costs, methodologies, and the scope of work involved. Remember to review the reputation and credentials of the contractors, seeking referrals or reading reviews from previous clients to ensure their reliability and quality of work. Budgeting for Unexpected ExpensesDuring the pool removal process, unexpected expenses may arise. It's wise to allocate a contingency budget to account for any unforeseen complications, such as the discovery of underground utilities, structural issues, or poor soil conditions. Having a buffer in your budget will help you address these challenges without derailing your project. Reusing or Selling Pool ComponentsIf the pool removal involves salvaging any reusable components, such as pumps, filters, or pool equipment, you may consider selling them. Depending on their condition, these items may have some value, offsetting a portion of the pool removal cost. Consult with your contractor or explore online marketplaces to explore potential buyers interested in used pool equipment. Long-Term SavingsWhile the upfront cost of removing a concrete pool may seem substantial, it's crucial to consider the long-term savings. By eliminating ongoing pool maintenance, repairs, and operating costs, you can potentially save significant amounts over time. Additionally, repurposing the space for landscaping, outdoor living areas, or other purposes may increase the value of your property in the long run. Concrete Pool RemovalRemoving a concrete pool involves several factors that influence the overall cost. By carefully considering the size, access, demolition method, permits, and additional expenses, you can budget effectively and ensure a successful pool removal project.
Remember to consult with professional contractors, obtain multiple quotes, and account for potential unforeseen expenses. With proper planning and budgeting, removing a concrete pool can transform your property, enhance your lifestyle, and provide a fresh canvas for future projects. Can You Remove Concrete Around Your Pool?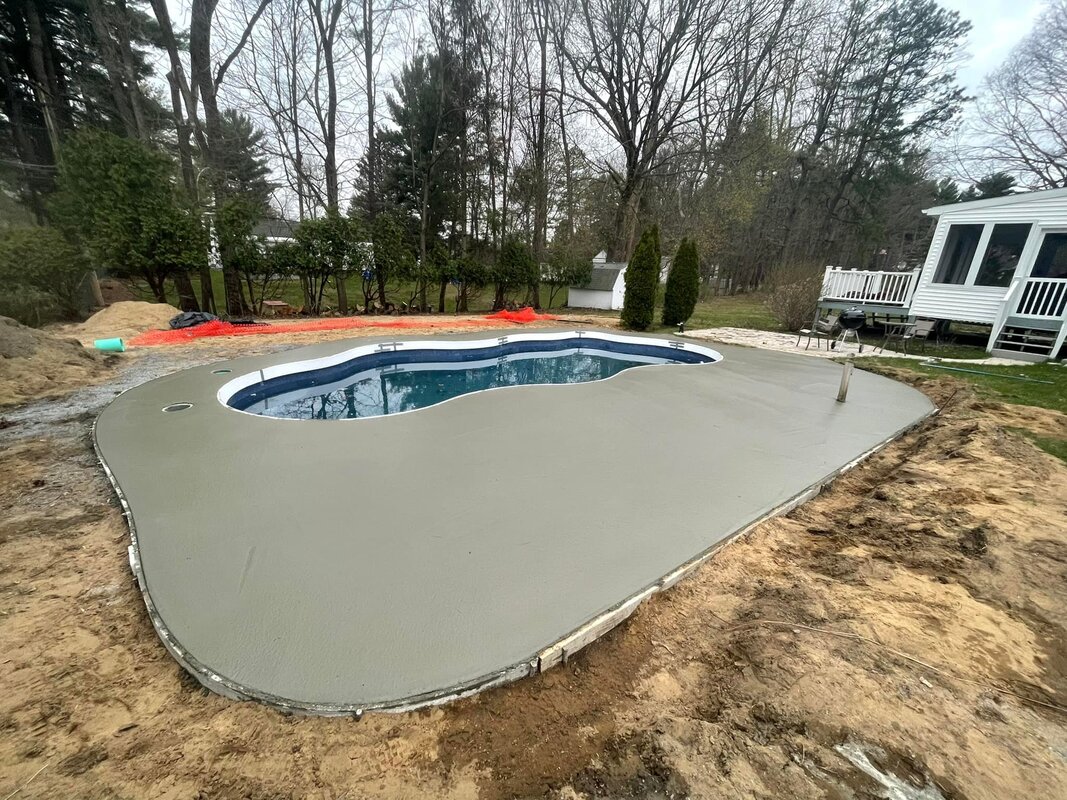 When it comes to enhancing your pool area, one consideration that often arises is whether you can remove the existing concrete surrounding your pool. Many homeowners find themselves contemplating this question as they seek to revitalize their outdoor space or explore alternative options for their poolside entertainment. In this article, we will delve into the subject and explore the possibilities and considerations involved in removing concrete around your pool. Assessing the Current ConcreteBefore embarking on any poolside renovation project, it's crucial to evaluate the condition of the existing concrete. Look for signs of cracks, unevenness, or structural damage. If the concrete is severely damaged, removing it may be the best course of action. However, if the damage is minimal and the surface is relatively intact, resurfacing or refinishing the concrete might be more cost-effective and less time-consuming. Reasons to Remove Concrete1. Aesthetics: Concrete can appear dull and outdated, limiting your options for personalizing your pool area. Removing it allows you to create a more visually appealing space that aligns with your design preferences. 2. Safety Concerns: Uneven or damaged concrete can pose a safety hazard, increasing the risk of tripping or falling. Removing it ensures a level and secure foundation for your poolside activities. 3. Expansion or Alteration: If you plan to expand your pool area or make significant modifications, removing the concrete is often a necessary step. It provides a clean slate and allows for seamless integration of new features, such as additional decking, landscaping, or outdoor amenities. The Removal Process1. Professional Assistance: Removing concrete around a pool requires expertise and specialized equipment. Hiring professionals who specialize in pool remodeling or concrete removal is recommended to ensure a smooth and efficient process. They will have the necessary tools, knowledge, and experience to complete the task safely. 2. Permits and Regulations: Before commencing any construction or remodeling work, be sure to check local building codes and regulations. Some areas may have specific requirements for pool renovations, including permits or approvals. Ensure compliance to avoid any legal issues or delays in your project. 3. Excavation and Removal: The removal process typically involves excavating the concrete using jackhammers, saws, or heavy machinery. The depth of the excavation depends on your desired outcome. Once the concrete is removed, the area is prepared for further construction or landscaping. Post-Removal Options1. Decking and Pavers: After removing the concrete, you have a multitude of options for the new poolside surface. Wooden decking, composite materials, or natural stone pavers are popular alternatives that can transform the aesthetic appeal of your pool area. Consider the maintenance requirements, durability, and slip resistance when choosing the new surface material. 2. Landscaping and Green Spaces: Removing concrete opens up opportunities to incorporate green spaces, such as gardens, flower beds, or artificial turf. These additions can enhance the visual appeal of your pool area and create a relaxing ambiance. 3. Outdoor Living Features: With the concrete gone, you have the freedom to add various outdoor living features. Consider options like a patio, pergola, outdoor kitchen, or seating area to create a comfortable and inviting space for entertaining or relaxation. Outdoor Living Features in Replacement of Your Pool1. Water Features: Take advantage of the blank canvas created by the concrete removal to incorporate captivating water features. A cascading waterfall, a tranquil fountain, or even a rock wall with integrated water jets can add an element of serenity and create a soothing atmosphere in your pool area. 2. Fire Elements: Introduce warmth and ambiance to your poolside by incorporating fire elements. Fire pits, fire bowls, or even a built-in fireplace can serve as focal points while providing a cozy gathering space during cooler evenings. These features add a touch of elegance and create an inviting atmosphere for relaxation and entertainment. 3. Lighting: Illuminate your pool area with carefully placed lighting fixtures to enhance its beauty and functionality during the evening hours. From subtle pathway lights to dramatic uplighting, well-designed outdoor lighting can transform the ambiance of your pool area and ensure safety around the water. 4. Outdoor Entertainment: Consider integrating entertainment options into your revamped pool area. Install a sound system that blends seamlessly with your surroundings, allowing you to enjoy music while lounging by the pool. If you're a movie enthusiast, an outdoor projection screen or a weather-resistant TV can bring the cinematic experience to your poolside gatherings. 5. Eco-Friendly Additions: Embrace sustainability by incorporating eco-friendly elements into your pool area. Install solar-powered lights, invest in energy-efficient pool equipment, or create a rainwater harvesting system to reduce water consumption. By making environmentally conscious choices, you can enjoy your pool area while minimizing your ecological footprint. When choosing materials for your renovated pool area, prioritize durability and ease of maintenance. Opt for high-quality materials that can withstand the outdoor elements, including weather-resistant decking, stain-resistant surfaces, and low-maintenance landscaping. This will ensure that your pool area remains beautiful and functional for years to come with minimal upkeep. Removing the Concrete Around PoolIn conclusion, removing the concrete around your pool offers a myriad of possibilities for transforming your outdoor space. By considering various options such as decking, landscaping, water features, fire elements, lighting, and eco-friendly additions, you can create a customized pool area that aligns with your aesthetic preferences and lifestyle.
Remember to consult professionals, plan carefully, and let your creativity guide you in designing a poolside retreat that becomes the envy of your neighborhood. A Step-by-Step Guide: How to Remove a Concrete Pool Deck Concrete pool decks, while durable and long-lasting, may eventually require removal due to damage, remodeling, or personal preference. Removing a concrete pool deck can be a challenging task, but with the right approach and tools, it can be accomplished efficiently and safely. In this article, we will provide a step-by-step guide on how to remove a concrete pool deck, ensuring that you have the necessary knowledge to undertake the project successfully. Safety PrecautionsBefore you begin the process of removing a concrete pool deck, it's crucial to prioritize safety. Here are a few essential safety precautions to follow: 1. Wear protective gear: Put on safety goggles, gloves, a dust mask, and steel-toed boots to safeguard yourself from potential hazards. 2. Mark utility lines: Identify and mark any underground utility lines near the pool deck area to prevent accidental damage. 3. Disconnect utilities: Shut off the water, gas, or electricity supply to the pool and surrounding areas. 4. Secure the work area: Establish clear boundaries around the work area to prevent unauthorized access and ensure the safety of pets and children. Gather the Necessary Tools and EquipmentTo efficiently remove a concrete pool deck, you will need the following tools: 1. Sledgehammer: A heavy-duty sledgehammer will be your primary tool for breaking up the concrete. 2. Jackhammer: If your pool deck is extensive or particularly thick, consider renting or purchasing a jackhammer to expedite the demolition process. 3. Pry bar and chisel: These tools will help you remove smaller pieces of concrete and facilitate the separation of the deck from adjacent structures. 4. Heavy-duty wheelbarrow or dumpster: You'll need a reliable container to collect and transport the broken concrete pieces. 5. Safety goggles, gloves, dust mask, and knee pads: These protective items will help keep you safe during the removal process. Prepare the Work AreaClear the pool deck area of any furniture, potted plants, or other obstacles that may impede your progress. Cover the pool to prevent debris from falling in. Start Breaking the ConcreteUsing a sledgehammer or jackhammer, begin breaking the concrete into manageable pieces. Start at one corner and work your way across the deck systematically. Aim for smaller sections, as it will be easier to handle and remove. Remove the Broken ConcreteOnce you have broken the concrete, use a pry bar and chisel to remove the smaller, more stubborn pieces. Place them in a heavy-duty wheelbarrow or dumpster for disposal. If necessary, have a waste management plan in place for the concrete debris. Check for Rebar or ReinforcementIn some cases, concrete pool decks may have rebar or other reinforcement materials embedded within them. Look for any metal reinforcement and remove it carefully using bolt cutters or an angle grinder. Level the SurfaceAfter the concrete is removed, you may be left with an uneven surface. Use a shovel or rake to level the area, removing any remaining debris or loose material. This step prepares the ground for any future plans, such as installing a new pool deck or landscaping. Clean Up and Dispose of DebrisProperly dispose of the broken concrete by contacting a local waste management company or recycling facility that accepts construction debris. Ensure compliance with local regulations and environmentally friendly practices. Removing a Concrete Pool DeckRemoving a concrete pool deck requires careful planning, the right tools, and a methodical approach. By following the step-by-step guide outlined in this article, you can successfully remove your concrete pool deck and prepare the area for future renovations or landscaping projects.
Remember to prioritize safety throughout the process and consider seeking professional assistance if you are unsure about any aspect of the task. With patience and determination, you can achieve a clean and clear space for your pool deck transformation. What is a Commercial-Grade Concrete?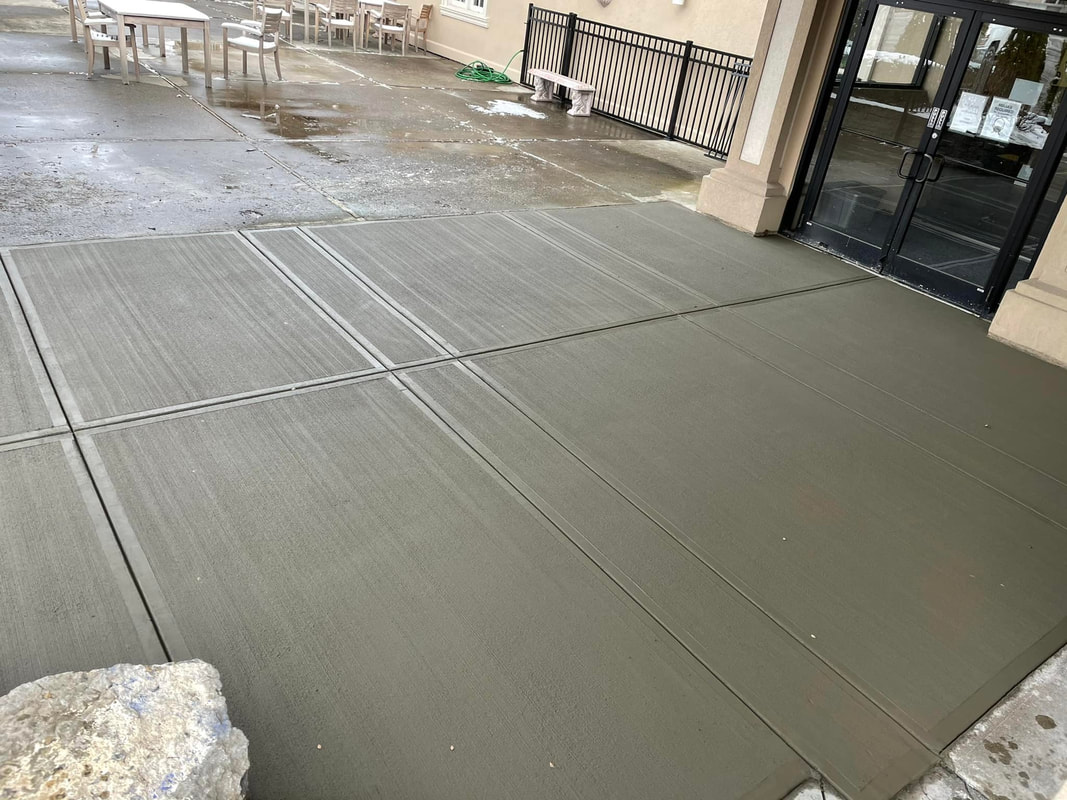 Commercial-grade concrete refers to a type of concrete that has high compressive strength. This means it has greater resistance to cracking or breaking compared to ordinary concrete. In addition to being stronger, commercial-grade concrete also requires less maintenance and lasts longer. What makes it special? Commercial-grade concrete is used in construction projects such as bridges, buildings, highways, and parking lots. It’s often mixed with other materials like gravel, sand, and cement. Commercial-grade concrete comes in two main varieties: ready mix and precast. Ready mix concrete is poured into forms and then left to cure before it’s finished. Precast concrete is cast in place and cured before finishing. Commercial-grade concrete is often called premium or high-performance concrete because it has higher compressive strength and better durability than standard concrete. Premium concrete is also stronger, more durable, and harder to wear than regular concrete. High-performance concrete is ideal for building large structures such as roads, bridges, and buildings. A Blend of Stone, Sand, Cement, and GravelThe ingredients in commercial-grade concrete are similar to those found in normal concrete. The difference lies in the proportions of each ingredient. For example, the ratio of cement to aggregate (sand, stone, etc.) can be different from one batch to another. Cement is the most important component of concrete. It provides strength and helps bind all the other components together. When you see “cement” on a label, it usually indicates that the product contains Portland cement. Other types of cements include portlandite, pozzolanic cement, and blended cements. Aggregate is the second most important component of concrete after cement. It provides strength and improves the workability of the mixture. There are many kinds of aggregates including crushed rock, river stones, and recycled glass. Sand is an essential part of concrete. It adds weight, which gives concrete its structural integrity. Sand is added to concrete to make sure it doesn’t crack when it dries. Sand is also used to help control the consistency of the concrete. If too much water gets into the mix, the concrete will become very soft. Too little water causes the concrete to harden prematurely. Gravel is a common additive in concrete. It’s added to increase the density of the concrete and improve its performance. Gravel is sometimes referred to as coarse aggregate. Coarse aggregate is made up of small pieces of rocks and pebbles. Mixing concrete is easy if you follow these tips. First, add enough water to the dry ingredients to form a thick paste. Then stir well until the ingredients are evenly distributed. Next, pour the mixture into the forms and let it set for at least 24 hours after application. After curing, finish the surface by brushing on a sealer or applying a colored stain. Concrete application materials normally involve concrete floor sealants and concrete floor paint. What is The Water Absorption Level of a Commercial-Grade Floor?Water absorption level refers to how quickly concrete absorbs moisture. Concrete absorbs water through capillary action. Capillarity is the process by which liquids move along the surface of a material. This movement occurs naturally when the liquid touches the surface of the material. As concrete ages, it loses some of its ability to absorb water. Concrete surfaces exposed to extreme heat or humidity may have a lower water absorption rate. In this case, the concrete should be sealed with a waterproof coating before being installed. Concrete that has been exposed for long periods of time to sunlight may lose some of its strength. To prevent this, apply a protective coat of paint or epoxy resin to the surface of the concrete. Commercial-Grade Concrete RepairIf your concrete floor needs repair, there are several options available. You can use a patching compound to fill cracks and holes in the concrete. A patching compound is a thin layer of mortar mixed with sand and gravel. Once applied, the commercial-grade blend sets up within minutes. Patching compounds come in various colors and textures. They can be painted over or left natural. Another option is to replace the damaged area with new concrete. New concrete is stronger than old concrete because it has more calcium carbonate (CaCO3) in it. CaCO3 is the main ingredient in limestone. Limestone is one of the most abundant minerals found on Earth. Limestone is often used to create concrete. A third option is to install a floating slab. Floating slabs are poured directly onto existing concrete. Floating slabs are usually thicker than standard concrete. They provide extra support for heavy loads. How do I know if my concrete needs repair?There are many signs that indicate your concrete needs repair. Cracks in the concrete are the first sign that something is wrong. Cracking indicates that the concrete is losing strength. Cracks can appear anywhere from a few days after pouring to years later. If you notice any cracks, call an expert immediately. Cracks also occur where two different types of concrete meet. For example, a crack might develop between a concrete block wall and a concrete sidewalk. Other signs include: • Staining – If you see stains on your concrete, they could mean that the concrete is absorbing too much water. • Chipping – If you see chipped areas on your concrete, they may need repair. • Spalling – If you see spalling, it means that the concrete is deteriorating. • Fissures – If you see fissures, they could mean that your concrete is not strong enough to hold up against traffic. Where Can You Purchase Commercial-Grade Products?You can purchase commercial-grade products at home improvement stores like Home Depot and Lowes. These stores carry a wide variety of products, including concrete sealers, patches, and other materials. For expert application, professional concrete contractors use amazing products like fresh concrete, epoxy floor coating, and natural stone. They are much more knowledgeable about product quality and product dimensions you'll need compared to when you purchase online.
Meanwhile, retail purchases are also reliable as store staff also have sufficient product knowledge regarding concrete grades, commercial-grade sealers, and commercial-grade crack fillers. When purchasing these products, make sure to read the label carefully. Some products contain chemicals that are harmful to humans. Always follow the manufacturer’s instructions when using these products. How to Restore Stained Concrete Stained concrete has become a common sight around homes and businesses. Unfortunately, stains such as oil or grease left behind from food spills can be very difficult to remove. If you don't want to spend thousands of dollars replacing your driveway, consider using a stain removal kit instead. Concrete is a mixture of cement, sand, water, and aggregates (such as gravel). When poured into forms, these materials are mixed to create a solid mass that can then be cured at room temperature or heated to harden. To prevent further staining, concrete floor surfaces can also be sealed with epoxy sealers or special coatings. "Oil stains" are particularly problematic because they usually contain both organic solvents and oils. The presence of either component can cause serious damage to concrete. Fortunately, several ways to clean outdoor concrete won't require expensive chemicals or equipment. Restoration of Stained Concrete FloorsStains on concrete floors can occur in many different ways. Some are caused by using certain cleaning products, while others are due to improper maintenance. Whatever the source of the problem, it's important to know how to treat and repair stained concrete properly. The first step in restoring stained concrete floors is to determine your type of stain. Oil-based stains must be removed before any other steps can be taken. Once this is done, the next step is to apply a penetrating sealer to the surface. A topcoat sealer should follow this. If the stain is not oil-based, then follow the same process but skip the application of the penetrating sealer. Instead, apply a protective coating over the entire area. Once all the above steps have been completed, you'll need to wait for the stain to dry completely. Afterward, you can begin applying a new finish to the concrete space. The Process of Concrete StainingWhen concrete is first poured, it's called "green." This means it hasn't yet hardened completely. It's soft enough for workers to walk on without damaging the surface. After it's been set, however, it becomes harder and more durable. After it's fully cured, concrete stains can be colored with various pigments. Some colors are permanent, while others fade over time. You can choose between different types of finishes depending on what kind of look you prefer. You can apply color directly to the freshly-poured concrete or wait until after it's cured before applying the finish. Once the concrete is dry, you can apply the finishing product. Acid StainingAcid stains are commonly found on concrete floors. They come in two varieties: acid stains and acid etch stains. Acid stains are applied directly to the concrete. They're typically made from sulfuric acid, which reacts with calcium hydroxide in the concrete to produce a dark brownish tint. Sulfuric acid is corrosive and dangerous. It can burn skin and eyes and eat through steel reinforcement bars. If your home has a garage door opener, ensure it's protected against contact with this type of stain. Acid stains are easy to apply. Just pour some onto the concrete and allow it to sit for about 15 minutes. Then scrape it off using a putty knife or similar tool. Etch stains are less common but just as effective. They're applied to the concrete after it's been partially cured. They're made from hydrofluoric acid, which dissolves the calcium hydroxide in concrete. When the concrete dries, the resulting pattern looks like tiny pits. Etch stains are more difficult to apply than acid stains. You'll need to mix the acid with water and then apply it to the concrete. Wait at least 24 hours before scraping it off. Urethane for Industrial CoatingUrethanes are popular coatings for industrial building floors. They're usually sprayed on top of existing paint jobs. Urethanes protect against weathering and corrosion. They're also resistant to scratches and dents. Urethanes are available in several different forms. One of the most common is spray urethane. Spray urethane comes in two main varieties: clear and semi-transparent. Clear urethanes are used when you want to see the underlying substrate. Semi-transparent urethanes are used if you don't want to see the substrate. To apply a urethane coating, follow these steps: 1. Clean the area thoroughly. Use soap and warm water. 2. Apply primer. Primer helps prevent staining by sealing any bare spots on the concrete. 3. Mix the urethane. To do so, add the appropriate amount of catalyst to the urethane base. 4. Coat the area. Using an airless spray gun, spray the mixture onto the concrete. Allow it to dry overnight. 5. Seal the area. A sealant will help keep the new coating intact. 6. Finish up. Remove dust and debris that may have accumulated during application. 7. Let it cure. The final step is waiting for the urethane to harden completely. This could take anywhere from one day to three weeks. Concrete Polishing FinishA concrete polishing finish adds shine and protection to concrete surfaces. It's often used on driveways, sidewalks, patios, and pool decks. Concrete polishers use abrasives to remove surface imperfections and dirt. There are many types of concrete polishes available. Some are designed for specific applications. For example, there are concrete polishes for driveway pavers, sidewalk pavers, and driveway slabs. Others are general-purpose products that work well on all kinds of concrete. The best way to choose a concrete polish is to look at its ingredients. Look for ones that contain no silica sand. Silica sand is abrasive and can damage concrete. Some finishes include additional chemicals. These are called "multi-purpose" products because they can be used on concrete and wood. What Stain Color Should you Use for Concrete Surface?Stains come in hundreds of colors. There are even some that match your home's exterior color. But what should you stain your concrete? Consider using a deep red or orange if you're looking for something bright and bold. If you prefer a muted tone, try a light gray or blue. Whatever color you pick, make sure it complements the rest of your house. Consider using dark brown if you'd like to go with a neutral color. Dark browns tend to blend in better with other colors. You can also opt for a contrasting color. Try a lighter shade of green or yellow. Or, if you want to stand out, go with a bright white. Concrete Stain & Sealer Paint ProductsWhen choosing a concrete stain, think about how much time you'll need to get the job done for the layers. You might want to start with a product that requires less maintenance. For instance, epoxy stains require only one coat. Epoxies are easy to apply. They're durable and long-lasting. However, they must be applied before the concrete has fully cured. On the other hand, acrylic stains can last several years without needing to be reapplied. Acrylics are more flexible than epoxies. That means they won't crack as easily. Another consideration is whether you plan to paint over the concrete after applying the stain. If you do, you'll need to select a paint that matches the color of the concrete. Residue and Chemicals from Concrete SealersSealers are typically made of latex. Latex is an oil-based material. When applied to concrete, it dries quickly. Once dry, it creates a protective barrier against moisture.
Latexes are usually clear or tinted. Tinting makes them easier to see when they've been applied. If you plan to paint over your concrete sealer, you'll need to find a paint that matches the sealer's color. Otherwise, the two will clash. If you don't plan to repaint your concrete, then you may not have to worry about matching the sealer's color to the existing concrete. A few things to consider when selecting a concrete sealer: • How thick does the sealer need to be? Thicker seals provide greater protection. • What type of finish do you want? A flat finish provides a smooth surface. It's ideal for driveways, sidewalks, and patios. • Do you plan to use a waterproof sealant? Waterproof sealants prevent water from penetrating into the pores of the concrete. This helps keep the concrete from becoming porous. • Is the concrete sealed already? If so, you may not need a sealer at all. |